How to translate a story
See how to publish stories in multiple languages
Prezly supports publishing stories and emails in 34 languages. See our list of supported languages. You can create stories with multiple languages within the story editor, making it easy to manage multiple translations at once.
We also offer story AI auto-translation as an add-on
Before you can start translating your Stories, you need to add the languages in your Site settings. Here's how.
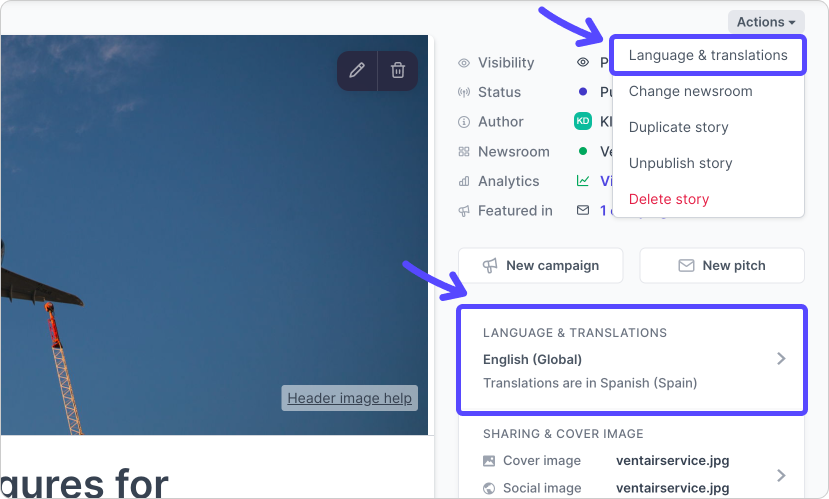
In the editor menu for your chosen Story, you can click on the Actions dropdown and then on Language & Translations or directly on the Language & Translations button in the right sidebar.

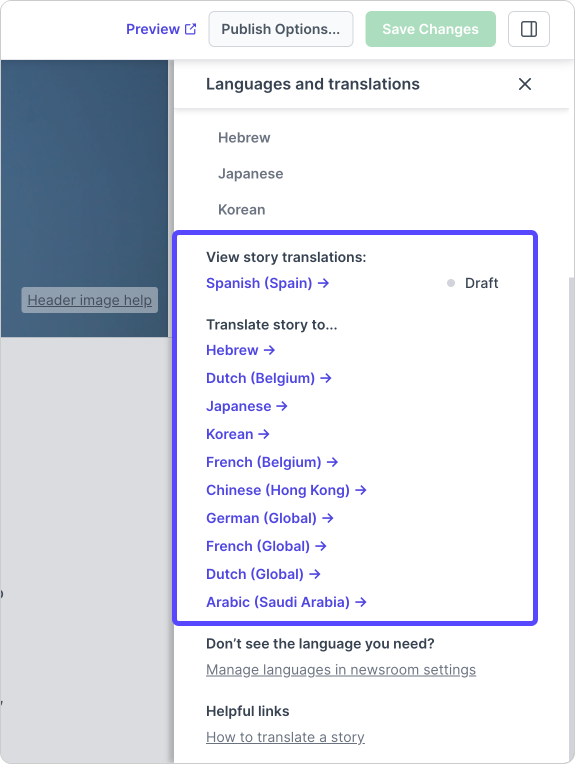
After you select the a language, Prezly will create a copy of that story that will immediately show on the editor. Then, you just need to translate the text in the story without having to re-upload all the assets, such as images and videos.
You will also be able to view all story translations and language options when you click on Language & Translations. This lets you switch between different translations of your story without having to leave the page.

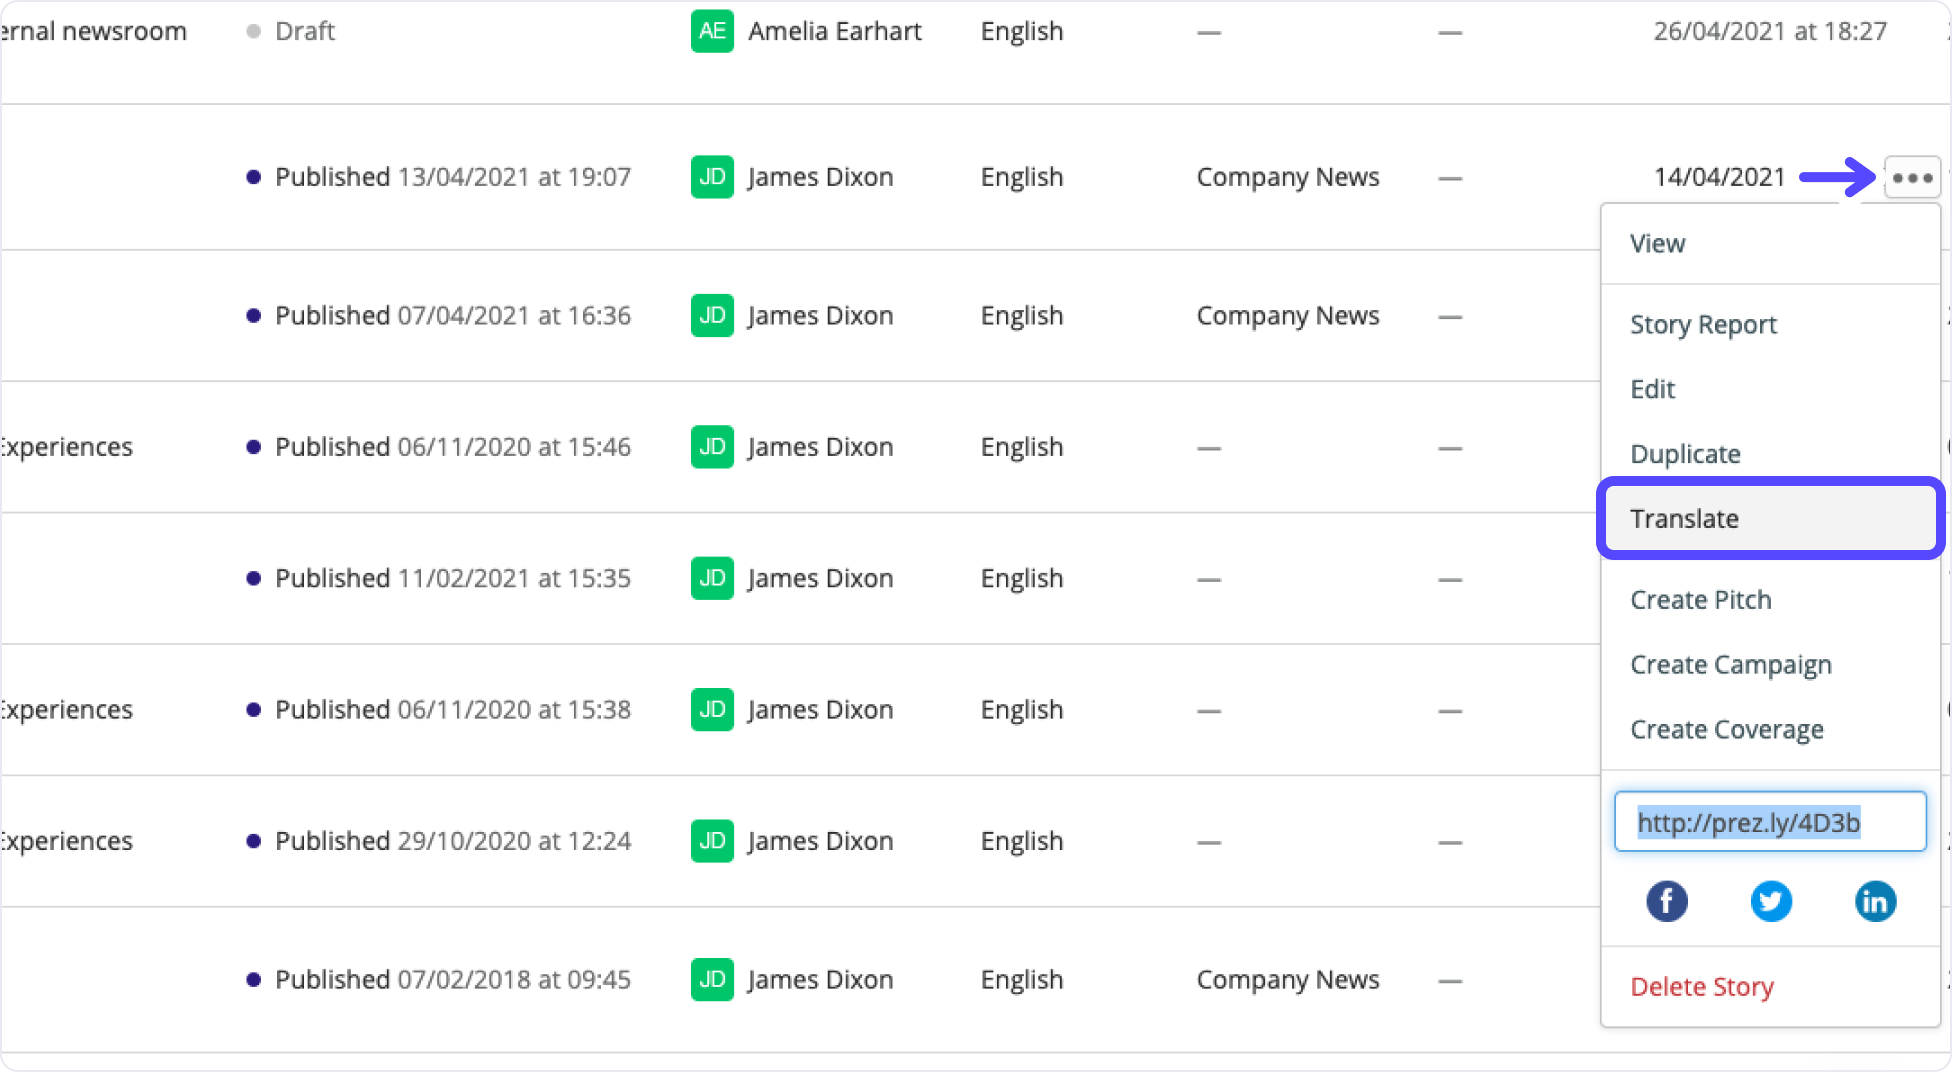
On the Stories page, hover over a story and click on the options menu ("•••"). Then, click on Translate. This works the same way as translating a story from inside the story editor outlined above.

If you can't find the language you want to use in the dropdown menu, simply head over to your Site settings to enable it for your site.
For PR teams looking to save even more time on their localization, we now offer an integrated AI auto-translation add-on, powered by DeepL. Here's Jesse to show you how it works:
Learn more about AI auto-translation.
Start earning more media coverage, free for 14 days
Try Prezly for free now and then keep using it for only $90/month.
