Site status: 'Live' and 'Non-live'
Setting up and adding content to your site before it goes public
When a site is created, it is set in Live mode by default. This means that the URL can be visited even before the site is fully set up.
However, there is also the option to switch the site to non-live, which is useful if you are still preparing and setting up your site before sharing it with your audience. Switching to non-live also comes in handy if you wish to pause working on a site for a longer period of time, but don't want to lose any of the settings or stories already added to it.
When your site is in non-live mode, it cannot be indexed by search engines, analytics are not collected and, while you are able to send campaigns associated with the site, the emails will display a warning indicating the site's non-live status.
However, even when the site is non-live, your site will still have a preview URL, which allows you to fully explore how everything will look once you take it live. You can also share this URL with your teammates. Note that this URL differs from the regular URL when the site is live.
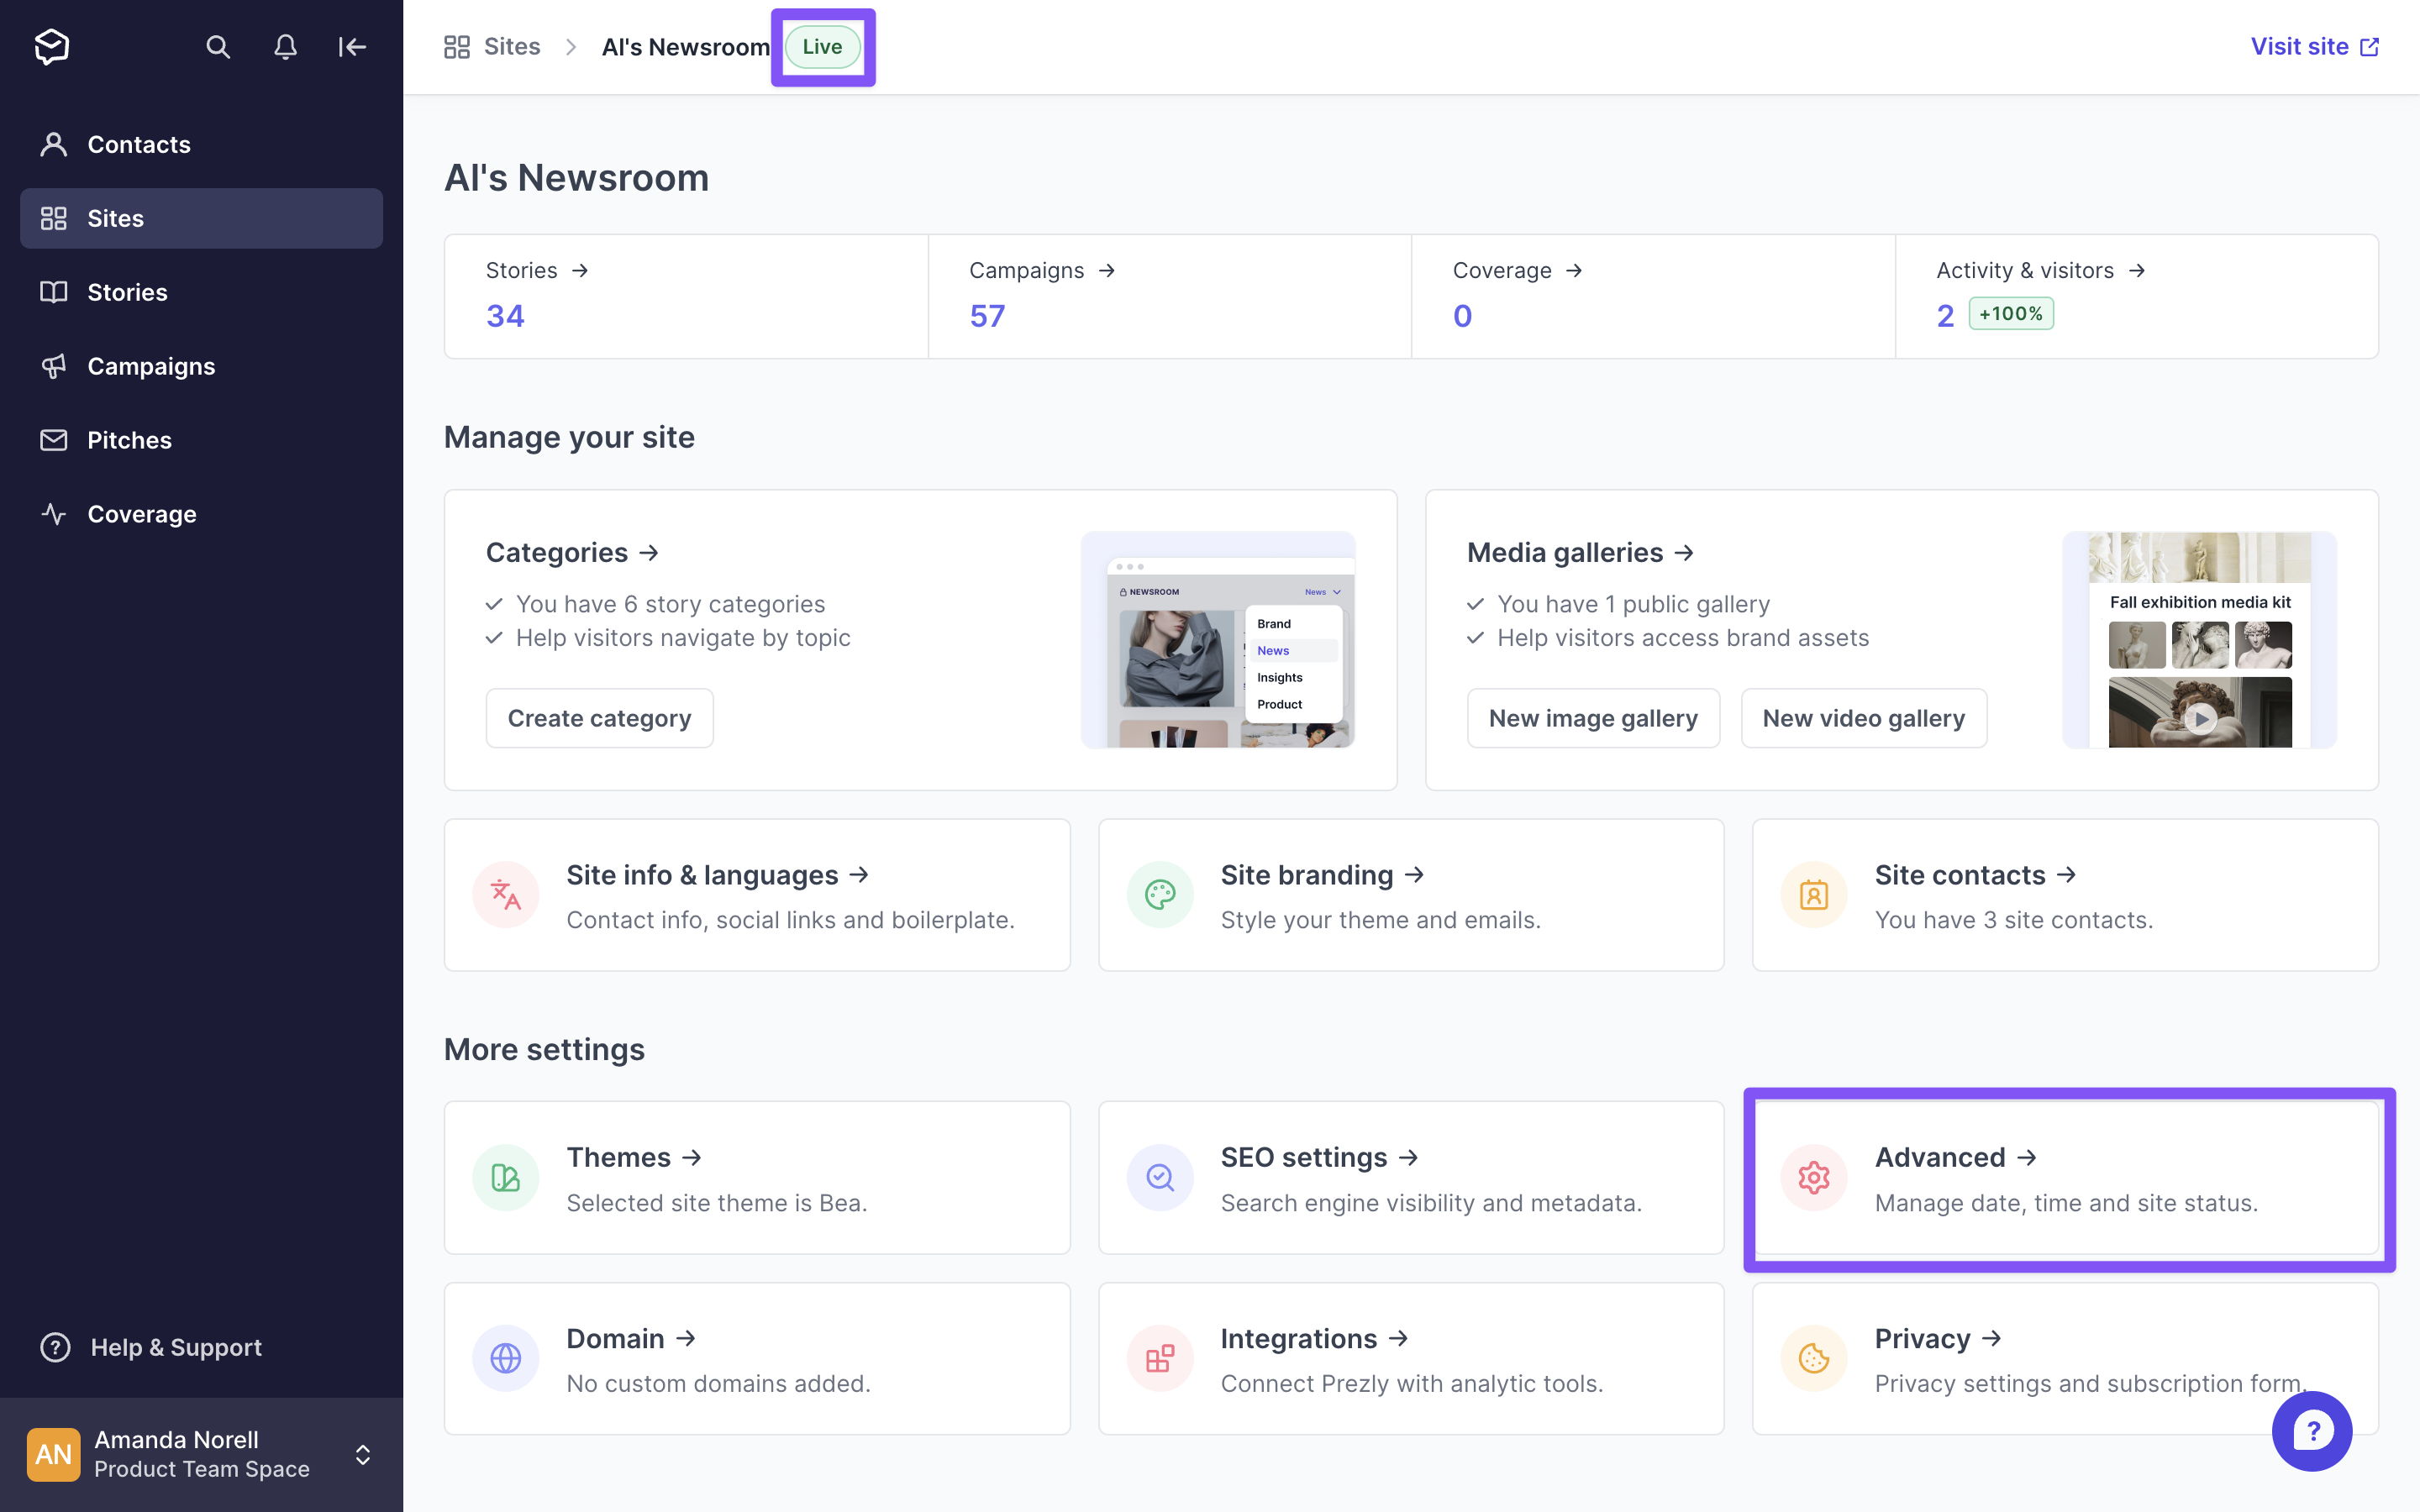
You can switch site status by clicking the status chip (labeled Live or Not live) in the header panel of any site related page, or Advanced settings from the site dashboard:

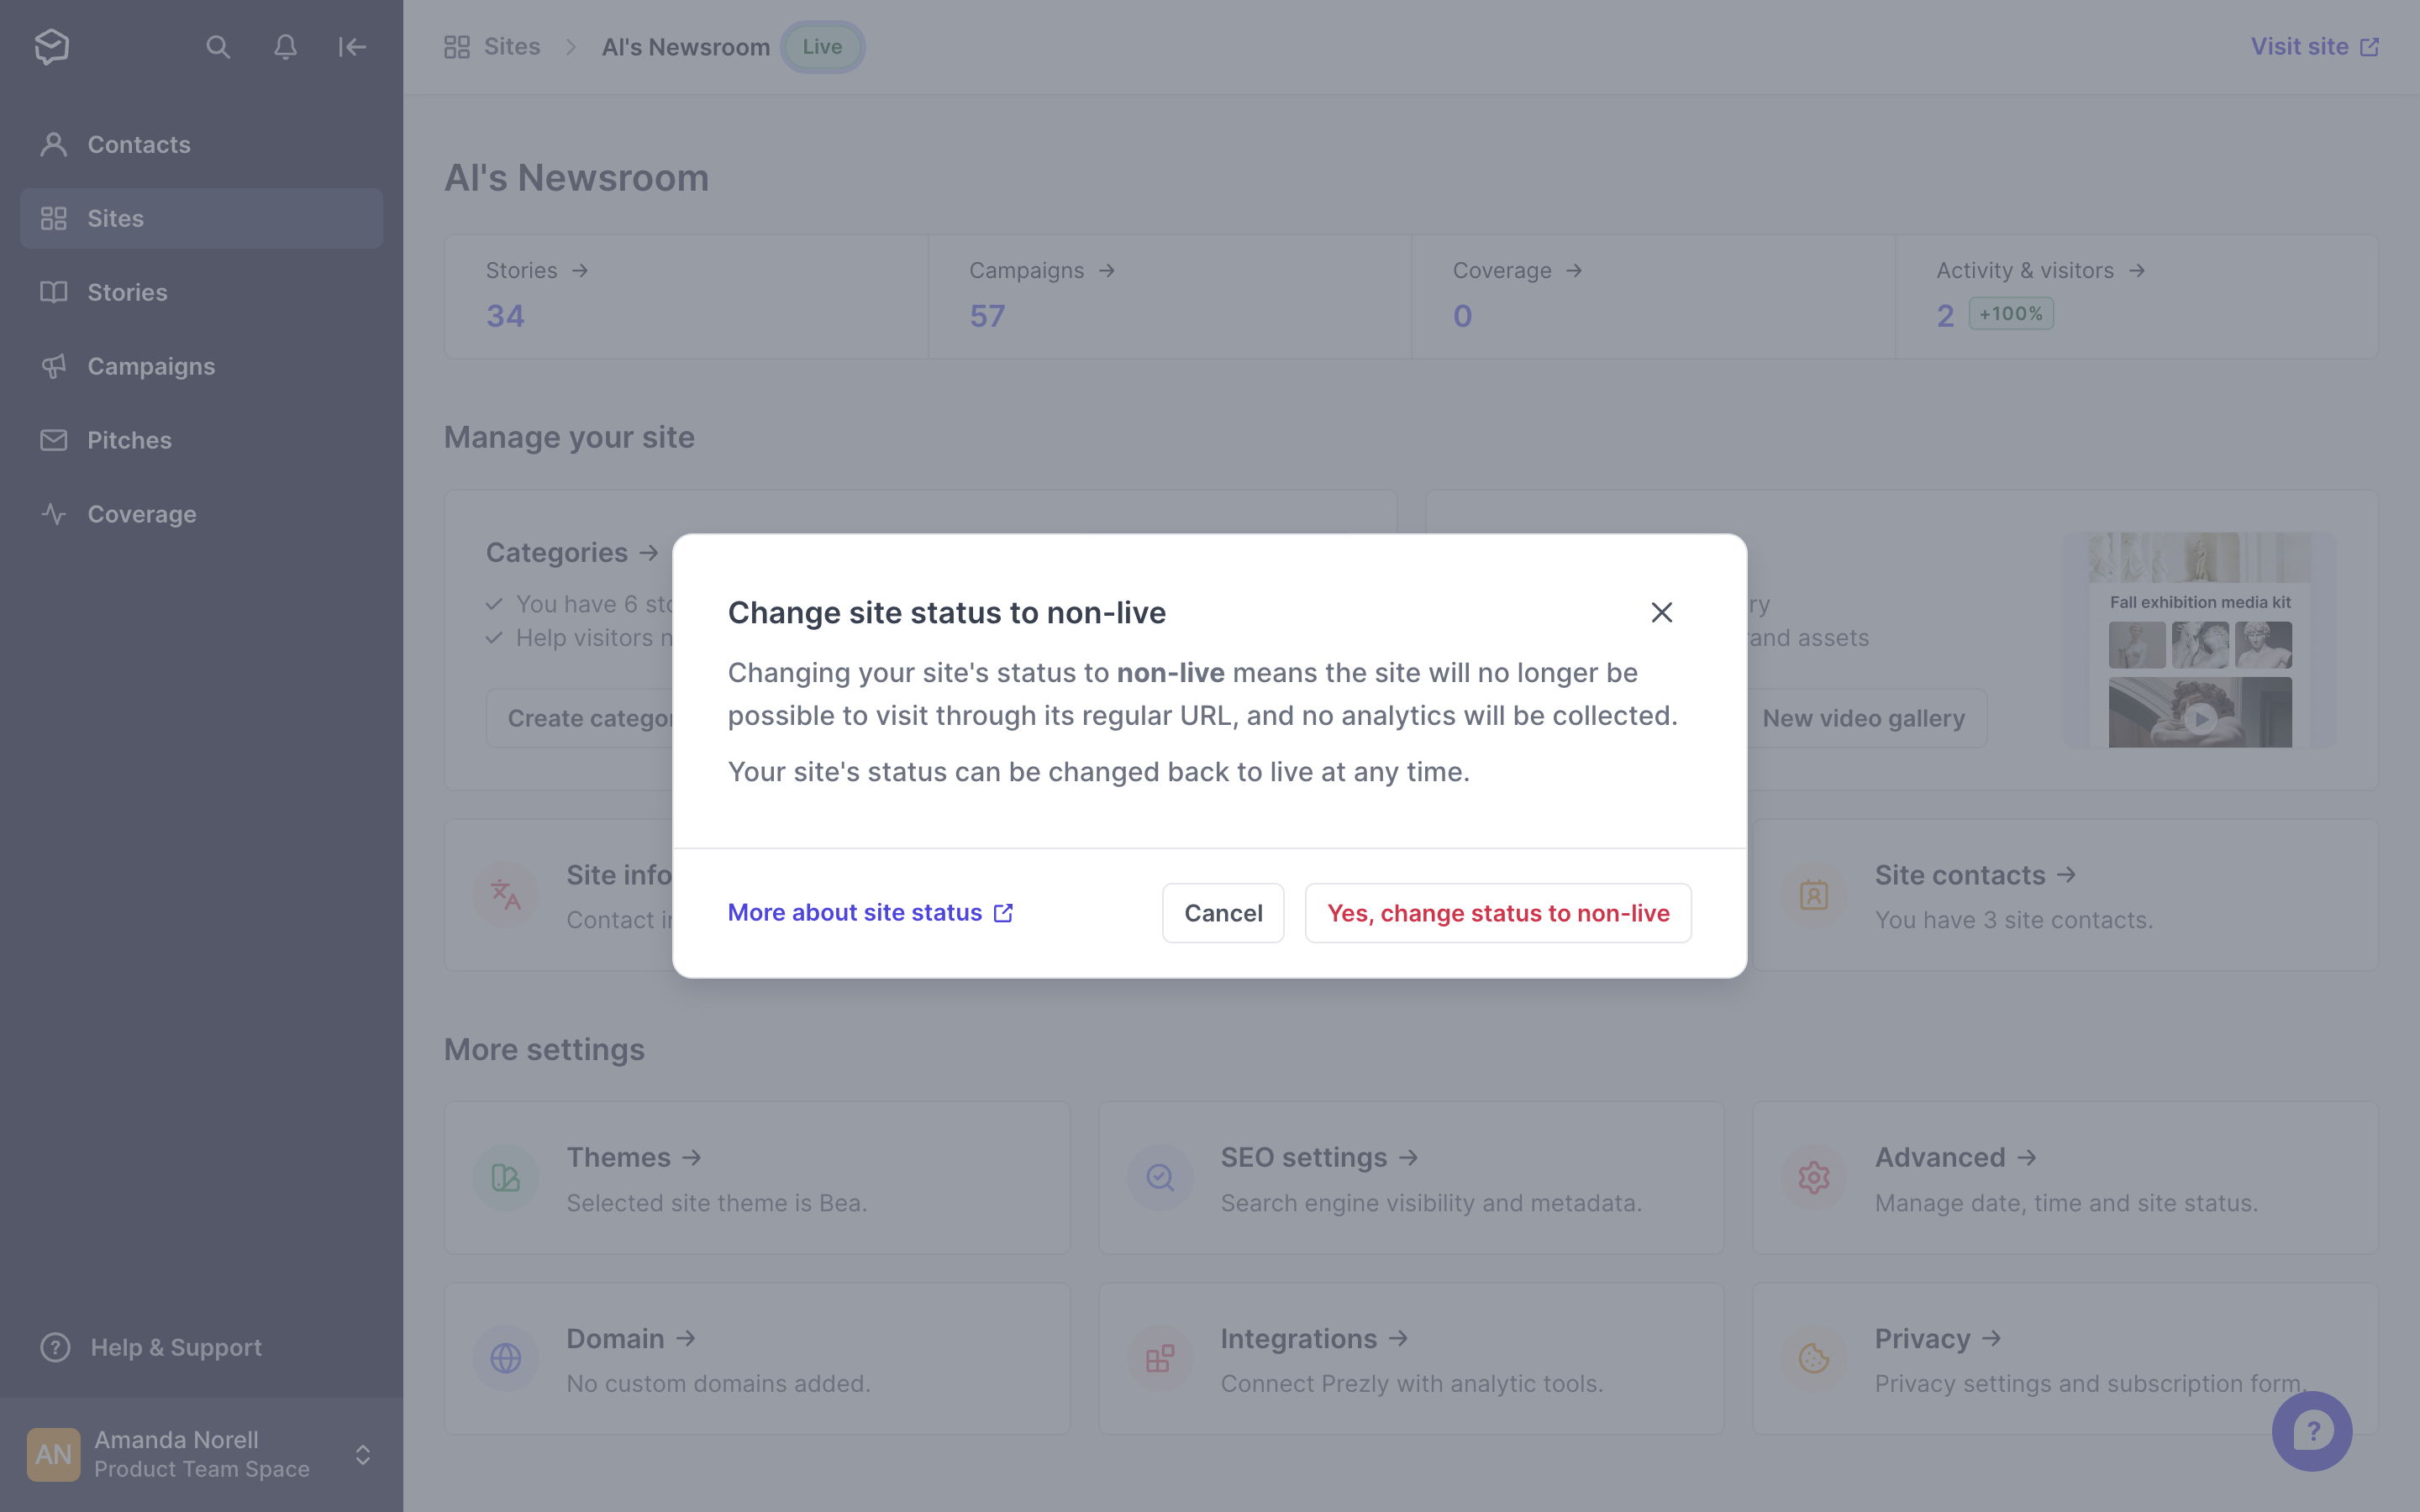
After clicking the header panel chip, you'll be asked to confirm the status change:

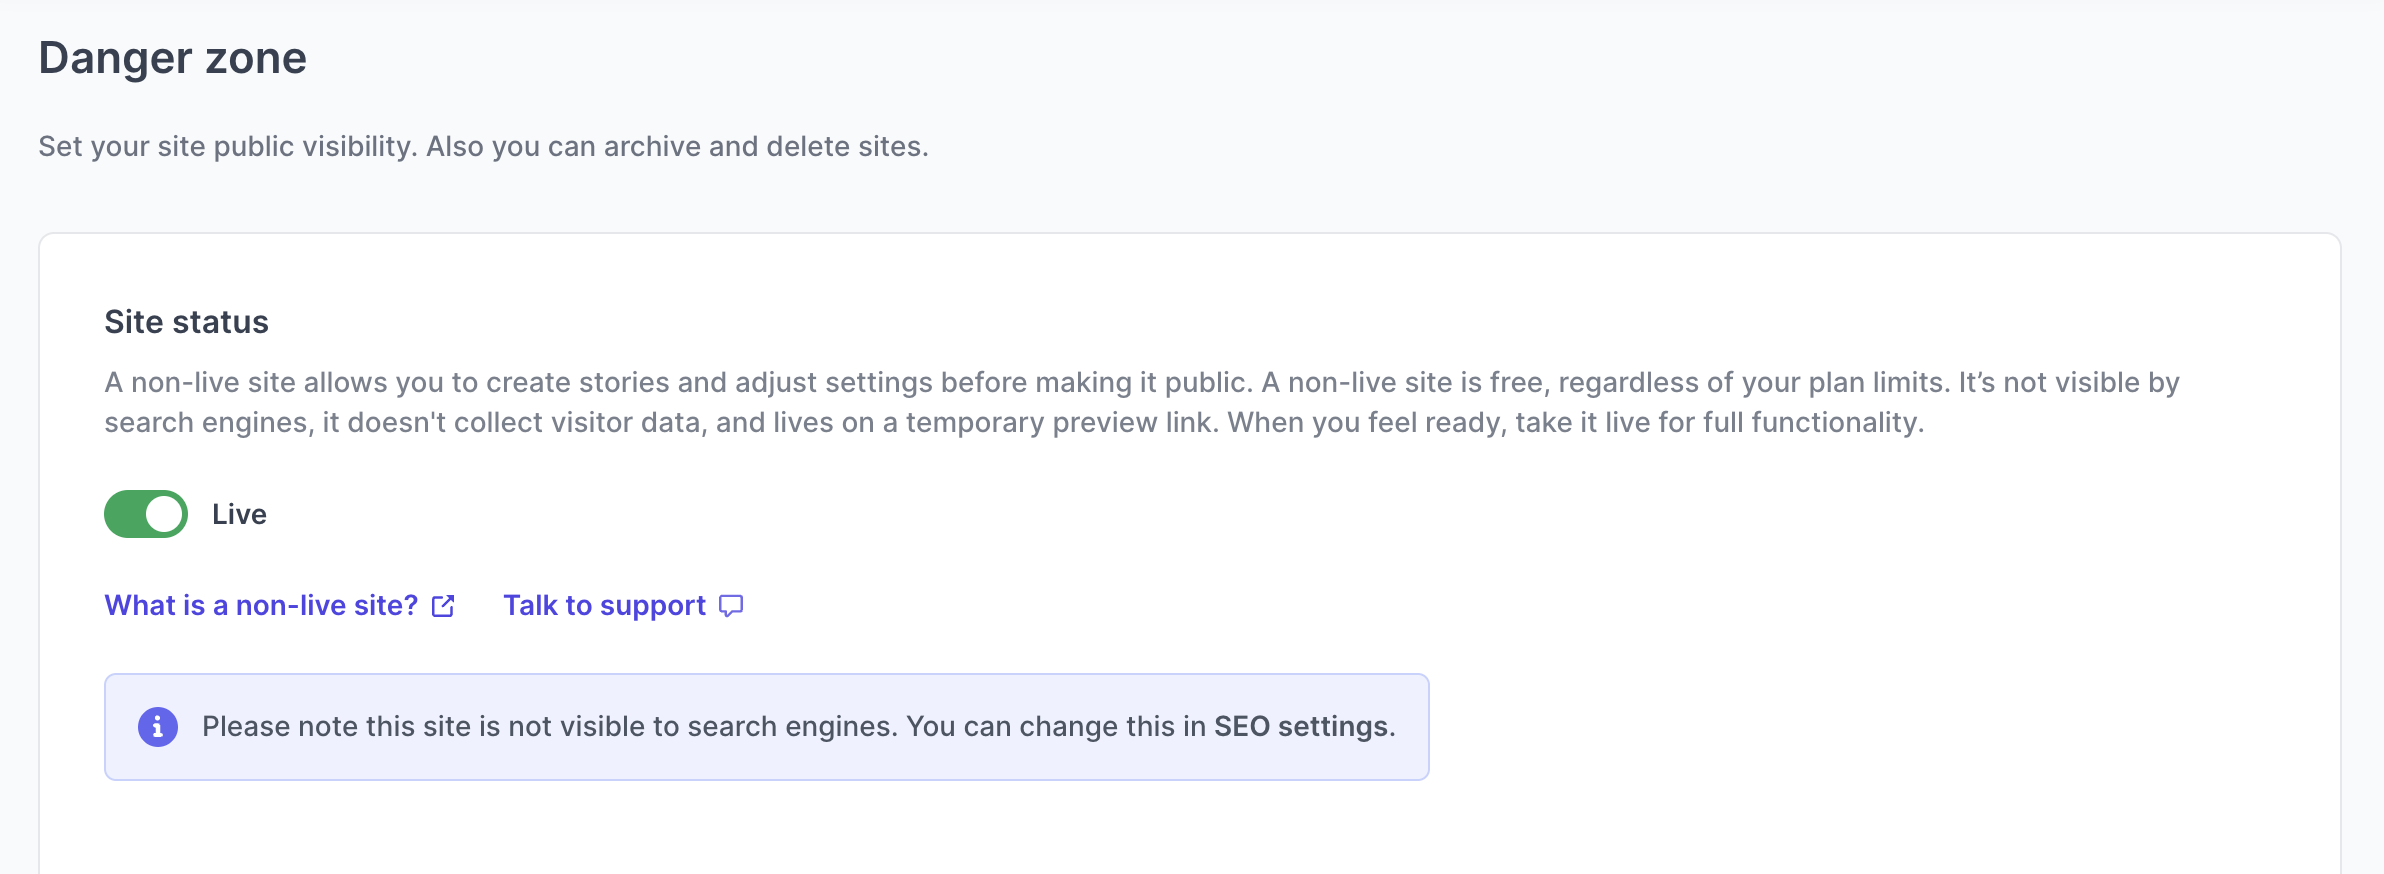
If you headed to Advanced settings, you can use the toggle to switch status:

Non-live sites can be created anytime, even if you have reached your maximum number of sites included in your plan. Then, if you would like to purchase an additional site to set it live and visible to the public, contact our Support team and we will help you out.